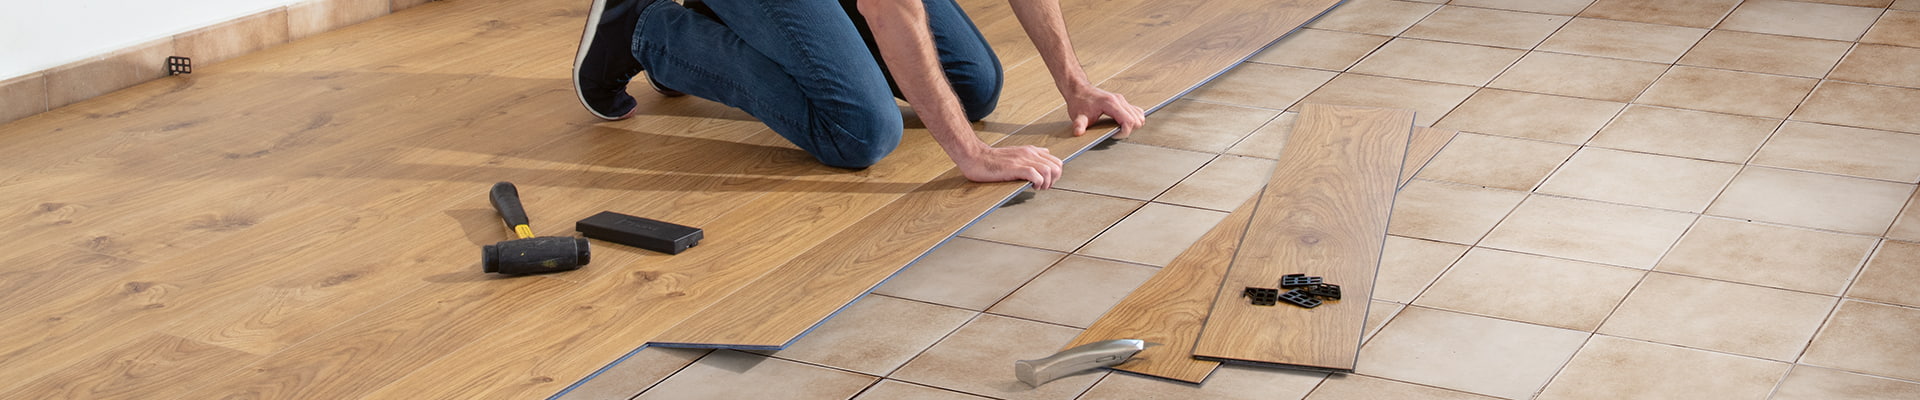
How to lay vinyl floors
Quick-Step vinyl floor installation
Download instructions for the correct floor code, watch the video and then follow the steps for rigid core vinyl or Vinyl Flex flooring.
Download instructions for installing vinyl flooring
Video instructions for installing vinyl flooring




Steps to install rigid core vinyl flooring
Prepare
Step 1: Gather your tools
Watch the list in the video and prepare all your tools in advance, from vinyl flooring installation kits to pencils and dimension notebooks.
Step 2. Check installation conditions
Check room conditions, background humidity and time for boards to adapt before installation.
- Let the board adapt to the conditions in the room.
- Substrate humidity must be within allowable limits.
- Room temperature should always be above 0 °C all year round.
Please read carefully instructions applies to floor code before installation.
Step 3. Prepare the background
Check old background. Quick-Step recommends removing the old coating and cleaning, smoothing, and fixing the substrate before laying.
Step 4. Install the door jamb base
Cut the underside of the door frame according to the floor level and leave enough space for the floor to stretch. Install the base strip before paving.
Step 5. Spread the primer
If the board does not have an integrated underlayment, spread the specialized underlayment in the same direction as the board will be laid, strip by strip and pressing the edges close to the wall. Tape the strips together with tape so they don't move.
Installation
Step 6. Rigid core vinyl flooring
- Divide the room width by the width of one board to calculate the number of rows of whole boards.
- Mark the position of the last row of raw boards on the wall. The row of edge boards needs to be at least 5 cm wide for ease of installation.
- Mix panels from multiple boxes to avoid placing panels with the same grain or color in one place.
- Align the first row parallel to the longest wall. Leave some distance from the wall as the edge of the wall may not be straight.
- Arrange the board end joints between two adjacent rows staggered at least 30 cm.
- Join the second surrender sheet with the first surrender sheet as shown in the video and then continue to join the remaining panels.
- Rigid core vinyl flooring is designed for surface installation.
Ciro herringbone floor uses a type of board that can be joined on both sides thanks to the Unizip seam. Watch the video to assemble the planks in the right direction.
Step 7. Cut rigid core vinyl plank
Wear gloves and use a pencil to trace the cut line. When sawing, always place the decorative side up.
Complete
Step 8. Finish Alpha Vinyl floor
Choose suitable skirting boards, braces and stair cladding to complete open positions.
Steps to install Vinyl Flex flooring
Prepare
Step 1. Choose mounting method
Choose to apply Flex Vinyl directly to the substrate or install over Flex Pro underlayment.
- Glue Vinyl Flex flooring with Quick-Step Vinyl Glue+ when a strong fix is required, such as in large rooms, where greater noise reduction is required, or in high temperature areas.
- Flex Pro Pure has a self-adhesive side. Peel off the protective layer and then apply the vinyl plank or pellet to the backing. Position can be adjusted during operation. The primer is composed of vegetable oils and minerals such as chalk.
Step 2. Prepare tools
Prepare a ruler, pencil, square, cut-resistant gloves, safety glasses, ink ribbon, Quick-Step vinyl cutter and roller of at least 50 kg.
If gluing, add an A2 Quick-Step serrated trowel.
If using Flex Pro, additional cams are required.
Find all the installation tools you needStep 3. Check installation conditions
Check room conditions, background humidity and time for boards to adapt before installation.
- Let the board adapt to the conditions in the room.
- Substrate humidity must be within allowable limits.
- Room temperature should always be above 5 °C all year round.
Please read carefully instructions applies to floor code before installation.
Step 4. Prepare the background
Vinyl Flex requires a completely flat substrate. Smooth out tile joints and check for signs of mold and moisture before laying.
See how to prepare the substrate
Step 5. Install the door jamb base
Cut the underside of the door frame according to the floor level and leave enough space for the floor to stretch. Install the base strip before paving.
Step 6. Apply primer if using Flex Pro Pure
Lay each strip of lining close to the wall and in the same direction as the planking.
To learn how to lay Flex Pro underlayment, download instructions for installing Vinyl Flex flooring (PDF).
Installation
Step 7. Vinyl Flex flooring
- Divide the room width by the width of one board to calculate the number of rows of whole boards.
- Mix panels from multiple boxes to avoid placing panels with the same grain or color in one place.
- Try joining the first three rows without using glue. Start the first row with a full-length panel.
- Arrange the board end joints between two adjacent rows staggered at least 30 cm.
- Cut panels in rows close to the wall according to the actual line of the wall.
- Draw a line along the first two test rows to mark the glue limit.
- Lift out the test panels and apply glue to the base from the wall to the line.
- Install the top three rows according to the standard line.
- Repeat the process until the entire room is tiled.
If using Flex Pro Pure backing, unroll the backing, peel off the protective layer and apply each vinyl plank or pellet to the self-adhesive side.
See details in complete installation instructions.
Step 8. Cut Vinyl Flex Board
Wear gloves, use a pencil to mark the cutting line. Place the decorative side up and use a concave blade knife and vinyl installation tool to score the panel. Just cut the surface, then use both hands to break off the excess.
Complete
Step 9. Finishing the Vinyl Flex floor
Install skirting boards and braces to cover floor edges and complete transitions.
Floor installation FAQ
See frequently asked questions to find out how to handle situations when laying and finishing floors.